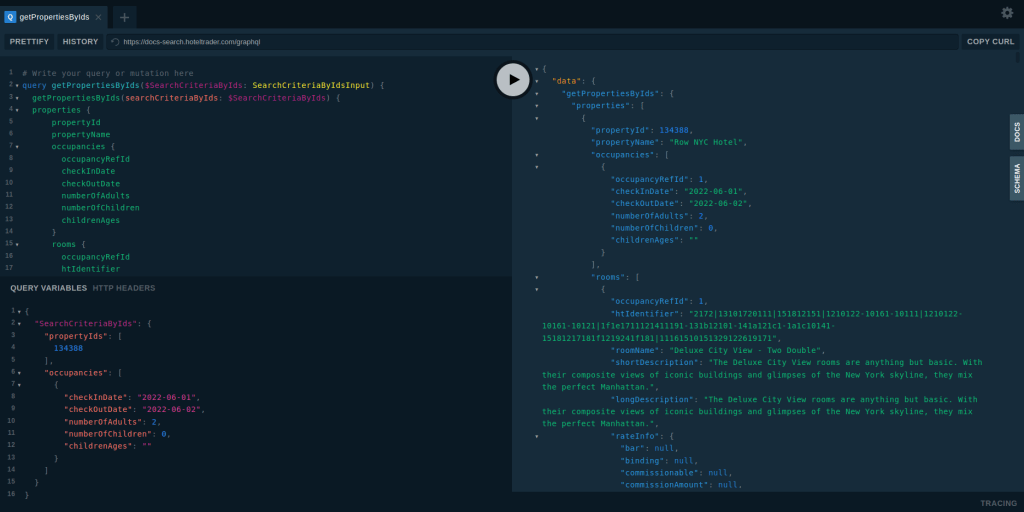
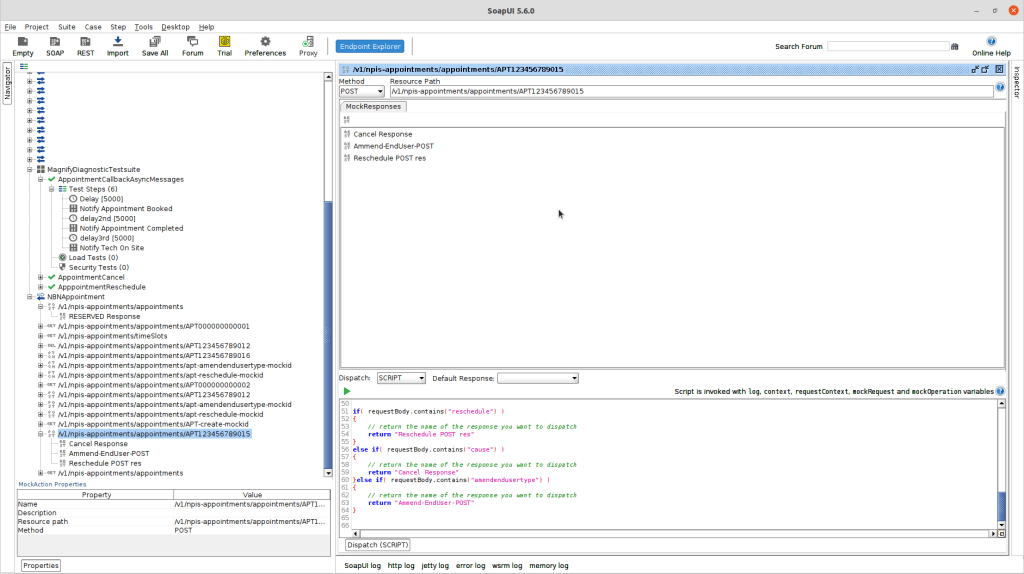
API developed using GraphQL is normally provided a convenient UI Tools that can be used to test the API calls. there are various tools that can be used to build this as mentioned here.
You can easily enter the payload, Query Variables and HTTP Headers to invoke the API calls.
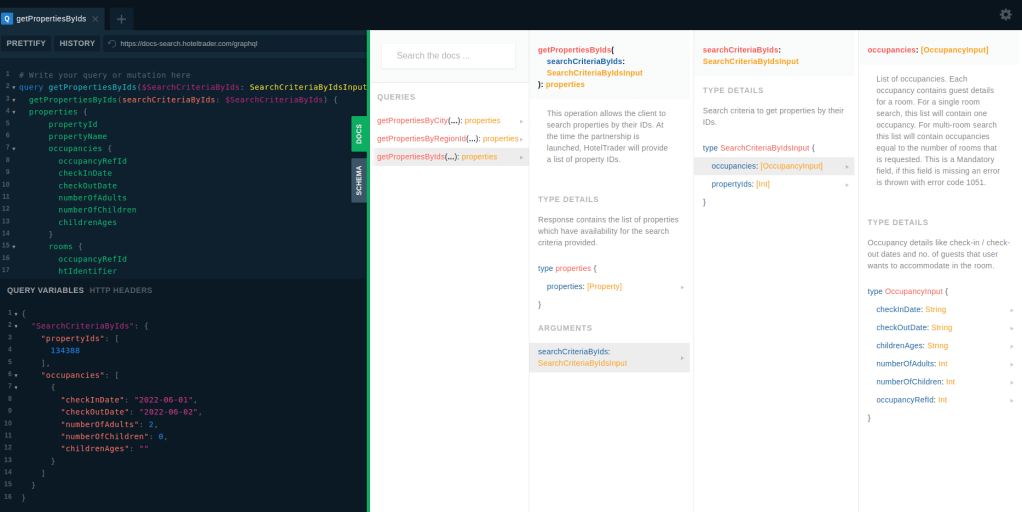
Also, you can use the Docs and Schema to see how is the API Structured before calling it.
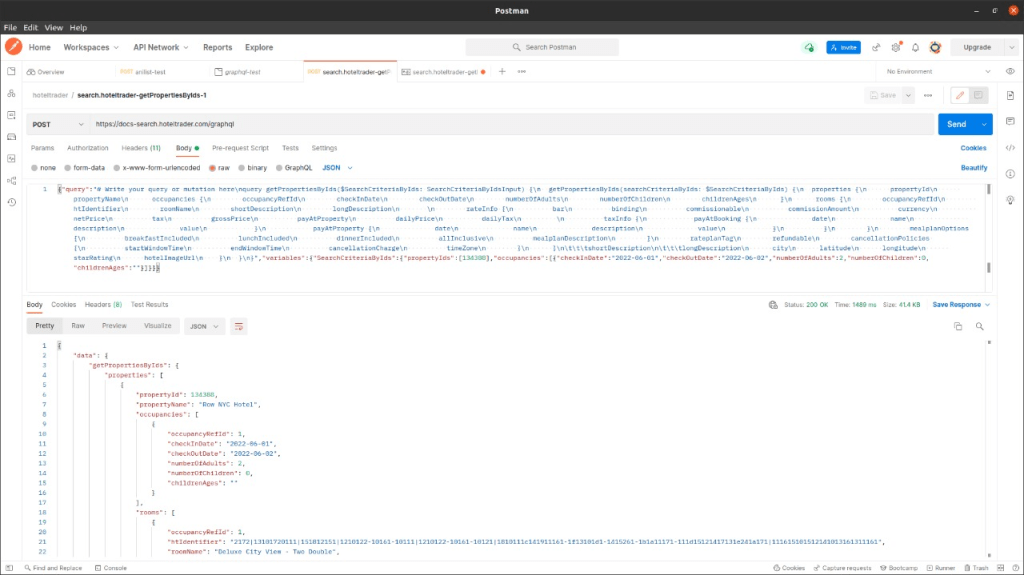
Anyway, same calls can be done trough curl or any HTTP client (eg : Postman / Insomnia / Direct Java HTTP Client code ). You can use debug mode (F12) in the browser to see how is the request goes to back-end.
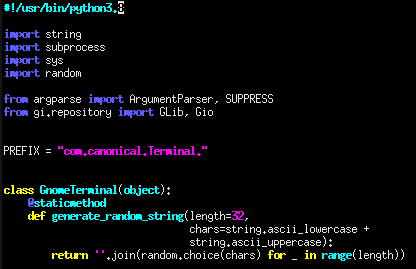
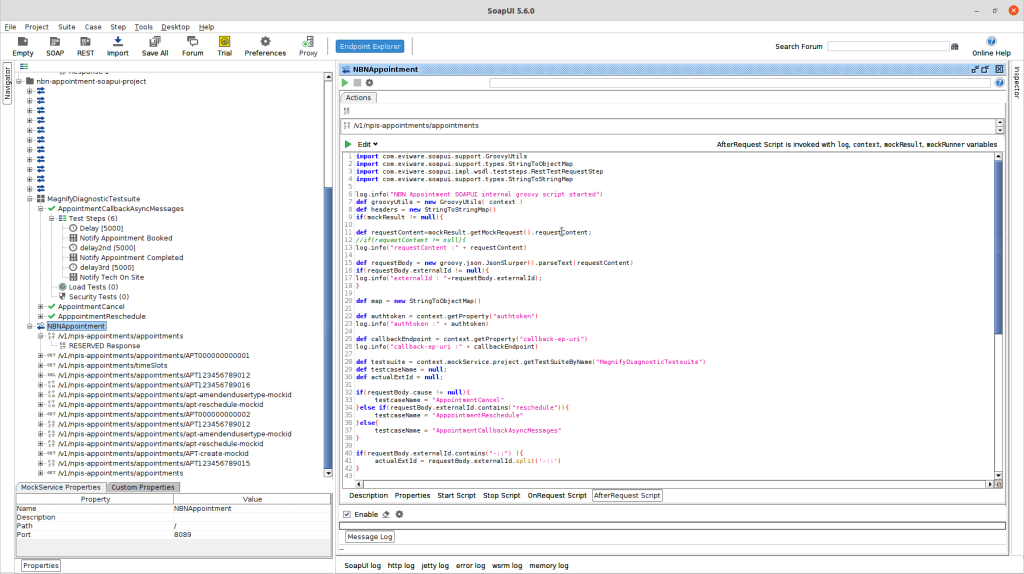
This happened when multiple python3 versions installed. We need to specify the exact version in that case. You can use Xterm like third party terminal for this.
Ansible playbook is the place where we can setup multiple tasks to get executed through Ansible.
This is mainly happens through playbook.yml file.
Note : The syntax and format follow in this YAML file and other relevant YAML file is VERY IMPORTANT. They must exactly follow the formats otherwise the application will misbehave
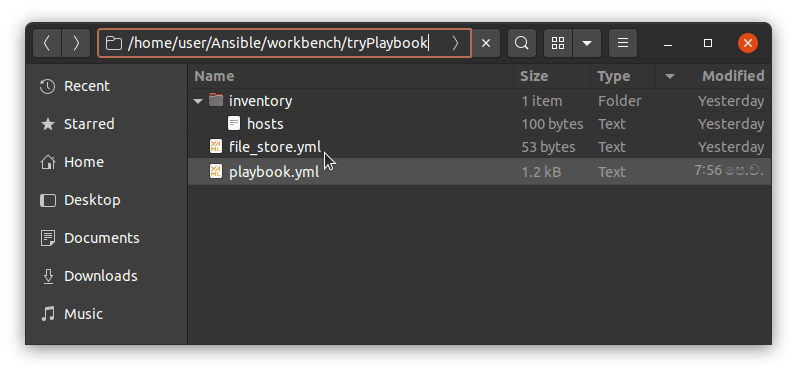
You need to create this playbook.yml in the place that you run the ansible commands
(Don’t worry about the file_store.yml file at this moment it is for one tasks to provide the directory names to create the directories in remote ansible hosts)
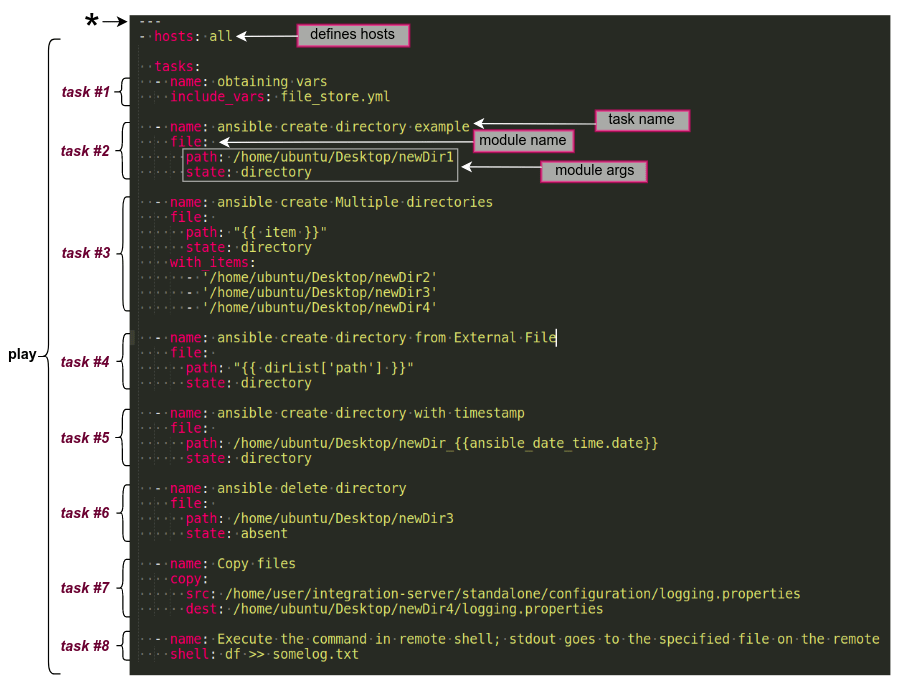
This is how the tasks defines in the playbook.yml.
Note : Please note the name ‘playbook’ is optional you can use anyother name also for that.
In this case, the playbook file part contains the tasks, hosts etc is called as a “play”. You can define multiple plays in a play book and you can give them a name also. And the connecting user also you can define in there.
The hosts parameter refers the Ansible hosts that the play is going to execute on. eg : you can mention the particular server group also in this case. Or you can mention them as all where it will effect to all of the servers in the host file.
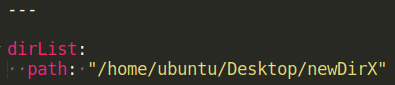
Ansible builtin file module is used for this and state directory is to create a directory in the path mentioned (newDir1 is the new direcotory name). If you are using the relative paths, path will be created related to the user directory.
(eg : if the path is path: newParent/newDir1, directory will be created under /home/ubuntu/newParent/newDir1)
In this case, we copy logging.properties file from Ansible Control Node – Local PC to newDir4 in the remote Ansible Host. For this we have used ansible builtin copy module.
In the previous aritcle we setup our VM and installed Ansible.
First ssh to the VM to see the user, password and ip is ok. You must be able to log with password.
eg : ssh ubuntu@192.168.1.20
Note : you can get the IP by running the ifconfig on the VM’s terminal.
Get ready…
Let’s try to run some basic Ansible commands.
First of all, to run Ansible, you need to have
One Ansible Control Node : machine we’ll use to connect to and control the Ansible hosts over SSH
One or more Ansible Hosts : any machine that your Ansible control node is configured to automate
In this case, our local PC is the Ansible Control Node and VM is the Ansible Host.
There are some prerequisites fulfilled before start playing with Ansible…
Ansible Control Node must have a non-root user with sudo privileges.
Ansible Control Node must have SSH keypair associated with this user.
Note : In this case, you must have been already setup the SSH Keys on the local PC. Otherwise refer : https://www.digitalocean.com/community/tutorials/how-to-set-up-ssh-keys-on-ubuntu-20-04,
Or you can generate SSH Keys using IDE’s also like eclipse
3. The Ansible control node’s SSH public key must have been added to Ansible Host’s authorized_keys for a system user.
You can easily do this by using ssh-copy-id in ssh-copy-id username@remote_host format
eg : $ssh-copy-idubuntu@192.168.1.20
Note :
Sometimes you may get below like error
sign_and_send_pubkey: signing failed for RSA “/home/user/.ssh/id_rsa” from agent: agent refused operation
In this case, you must add the ssh keys to Agent using $ ssh-add.
Here. if you get below like warning, you must change the access of the .ssh/id_rsa by running chmod 600 ~/.ssh/id_rsa since the private key has been exposed. Otherwise again ssh-copy-id will fail.
Warining : Permissions 0664 for ‘/home/namal/.ssh/id_rsa’ are too open. It is required that your private key files are NOT accessible by others. This private key will be ignored.
Once above done, run ssh-copy-idubuntu@192.168.1.20 again and you should see a success message.
Then try to run ssh ubuntu@192.168.1.20 again this time you must be able to connect without giving the password. This is password less login
Now environment is ready to do Ansible ping..
Do Ansible ping..
Ansible ping means running a connectivity test using Ansible’s built-in ping module. The ping module will test:
if hosts are accessible;
if you have valid SSH credentials;
if hosts are able to run Ansible modules using Python.
Hosts file…
You must define the host detail (IPs) in the file called .
The default location for hosts file is /etc/ansible/hosts. But you can define the hosts file in any location you want.
You must define the hosts IPs in the hosts file as mentioned below
This parameter makes sure the remote server uses the /usr/bin/python3 Python 3 executable instead of /usr/bin/python (Python 2.7), which is not present on recent Ubuntu versions.
Once the hosts file is defined you can run below command to list the inventories
ansible-inventory –list -y
Note :
If you run any ansible command having specific hosts file (not the generic on in /etc/ansible/hosts), you must give the path (absolute or relative path) using -i flag as follows
if the host file is in the same location that ansible command is executing : -i .
Note : this all will execute the ansible module in all the hosts. If you want to execute it only on certain hosts you can mention those specifically. eg :ansible server1 -m ping -u ubuntu
To play-around with Ansible we need to have another Machine. Since, I don’t have another PC I downloaded a Virtual Machine to setup.
I downloaded the Ubuntu 20.04 LTS for this.
Find available Linux VMs @ here : https://www.linuxvmimages.com/
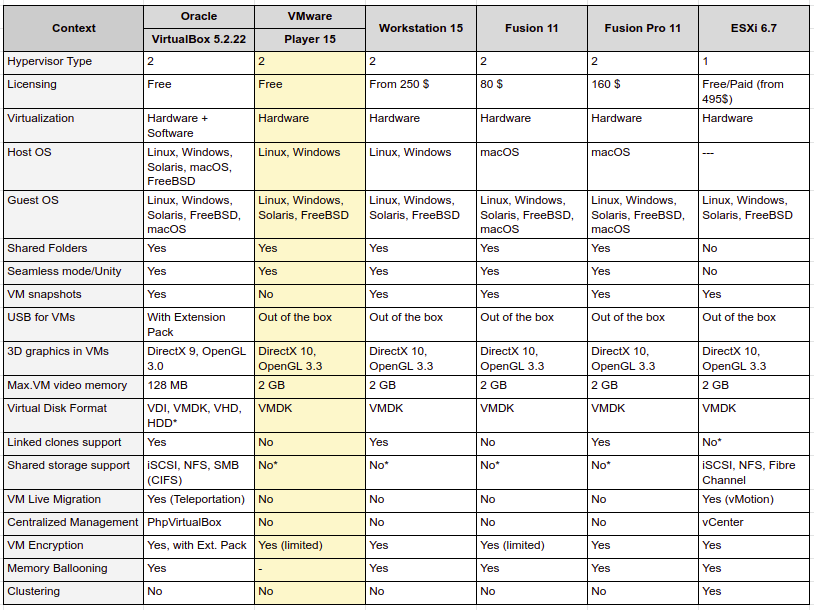
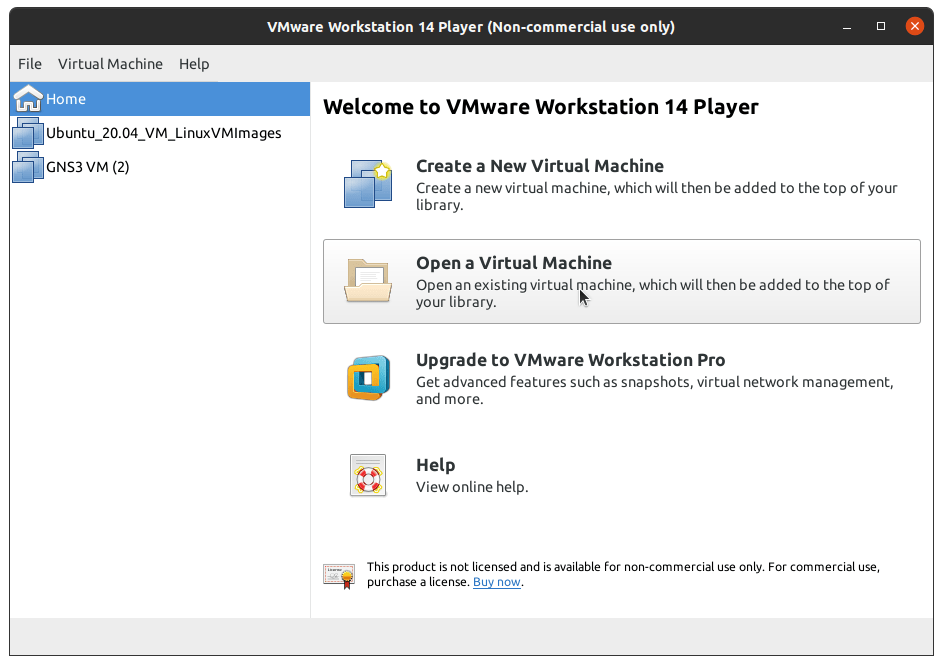
I selected the VM Ware Player to run this. Main reasons are it is free, it is light weight. Comparatively it’s UI is not that much sophisticated. But for my use case it is best suit since I’m mostly accessing it through Terminal.
Note : When you are installing VM Ware Player, you need to install VIX as well
Install VMware Workstation Player
VMware Workstation Player is the free version for VMWare.
Then run sudo ./VMware-VIX-1.17.0-6661328.x86_64.bundle to install it.
Note :
VMware-VIX version and VMware Workstation Player must be alligned.
eg : VMware-VIX-1.17 is working with VMware-Player-14. You can see that in the VMware-VIX download link also. Otherwise you’ll get some errors when GNS3 trying to connect to the GNS3VM
Anyway check this to decide any other option you are looking for.